Date: August 2, 2022
Location/Route Map:Kananaskis Valley Elevation: 2903 m
Elevation Gain: 1440 m, (690 m from KCR)
Distance: 10.7 km
Rating: Class 3 - Moderate
Notes: A very scenic and enjoyable scramble of a surprisingly easy Opal Range peak! I'd highly recommend doing the loop we did, tagging on King Creek Ridge in the morning and exploring more of this beautiful, hidden valley on the way out.
GPS Track:Download
After a beautiful hike up King Creek Ridge to start the day, it was time to find a way down to the grassy saddle between us and Mount Hood, so that we could continue up the opposite side of the valley to bag peak #2! (And no, this is not the 11,000ft volcano in the state of Oregon 😂, but still an impressive mountain nonetheless!)
Mount Hood via King Creek Ridge Route Map (see link in desciption - or click here - for interactive version).
As we started back down from KCR's "summit block" to look for a route down to the saddle, I almost immediately noticed a gully angling through the eastern cliff band, and decided to give it a go. The footing in the gully wasn't great, with loose pebbles strewn across hard packed dirt, but we stuck along the solid rock on skier's right, and made it down without much difficulty. (I've since read reports that if you descend to the lowest point between KCR's two summit bumps, an easier route does exist ¯\_(ツ)_/¯.)
Starting down our chosen descent gully to break through KCR's east face.
We hugged the wall to skier's right to make use of the solid rock.
Following another loose gully down as we angle through the cliff band.
We continued angling through the cliff band, easily following another loose gully down, at which point a short series of rocky ledges then took us down to the beautiful, meadowy slopes below the cliffs. Since our gully route angled away from the saddle, we now had to traverse back to our left to reach it, and while we did encounter our share of bush, this traverse was generally open, and easy to navigate and it wasn't long before we exited the bush and found ourselves directly above the grassy saddle.
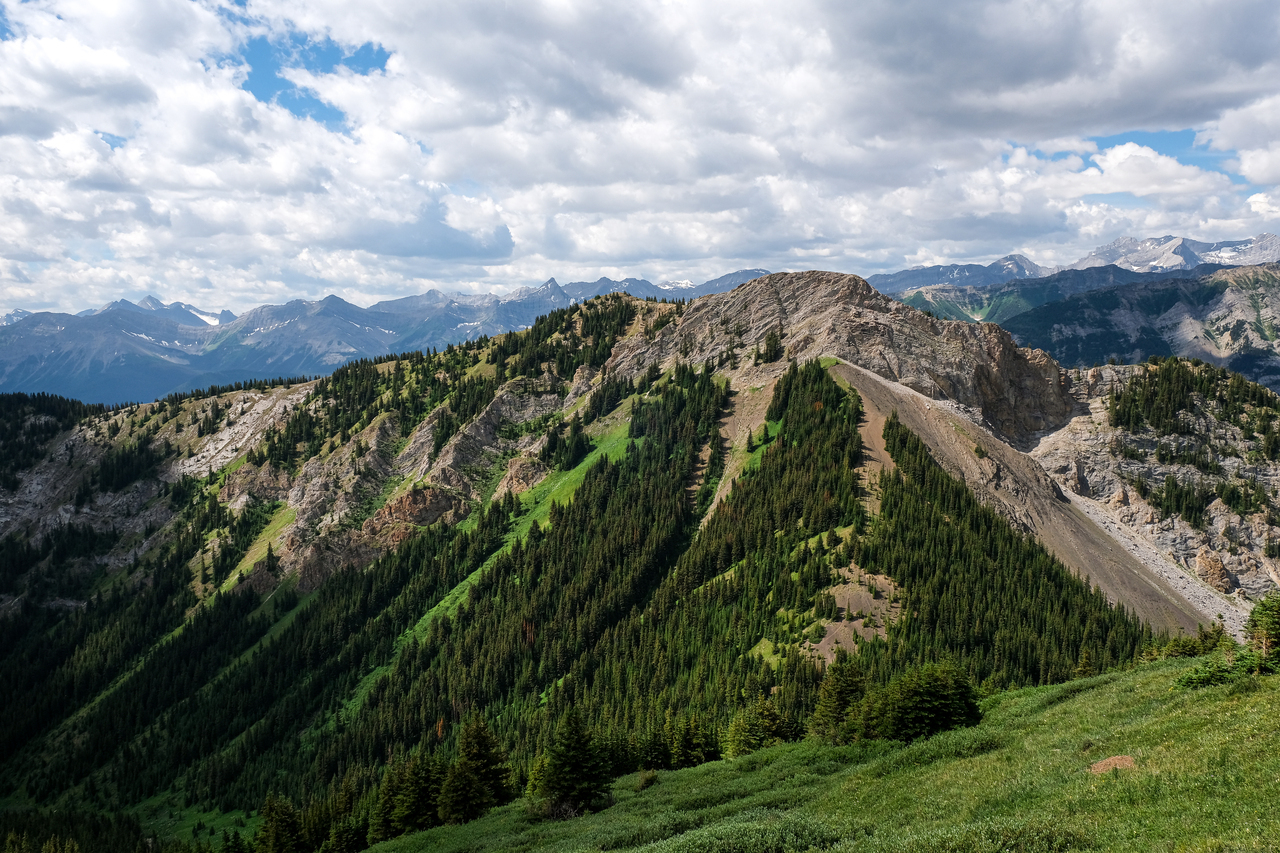
Mount Hood rises across the valley. We traversed left to reach the saddle.
Ascending to the base of Mount Hood's west face.
Looking back to KCR, as we quickly gain elevation up the opposite side of the valley.
The beauty of this valley never fails to amaze me! Vibrant green meadows, burst with colour from thousands of pretty wildflowers, and are guarded by an incredible wall of jagged towers to the east. It's so magical, you feel like you're in a fairy tale!
After easily descending to the saddle, we followed a faint trail leading up the grassy slopes on the opposite side of the valley. As we quickly started re-gaining the elevation we'd just lost from KCR, the trail eventually faded away, and while we briefly found ourselves waist-deep in bushes, route-finding was never an issue thanks to the openess of the terrain, and it wasn't long before greenery gave way to rock, as we approached the base of Mount Hood.
Our approximate route up Mount Hood's west face.
Traversing a broad scree ledge to rejoin with Kane's central gully route.
While Kane recommends ascending the central gully directly to the Hood/Brock col, that narrow, funnel of death looked far from appealing, and we decided to try a different route instead, ascending the more welcoming "ridge-like" slope to climber's left, before making a traverse higher up. Kaitlyn opted to wait for us below, taking the opportunity to do some art while we completed the scramble, and after ascending the inital, easy scree slopes, we soon reached the base of Mount Hood's summit cliffs, and easily traversed a broad scree ledge back to climber's right to rejoin with Kane's gully route.
The final scrambly bit to the col ("V" notch, upper left).
Finally getting our hands dirty as we ascend solid rock ribs. Photo credit: Dad
Scrambling up to the col (find Kaitlyn far below!).
We finally got our hands dirty on the final climb to the Hood-Brock col, enjoying some fun moderate scrambling on solid rock ribs, and aiming for a prominent "V" shaped notch that granted us easy access to our objective's southern summit ridge.
While it kinda feels like Mount Hood is "right there" upon reaching the col, you'll still have to put some effort in to gain its apex! If you think you're close just look back at Mount Brock - Looks absolutely massive doesn't it? - well, Mount Hood is the exact same height...
Looking ahead to the summit. An easy scree ledge by-passes a very gnarly, exposed ridge.
Ascending loose scree slopes to the summit of Mount Hood.
A scree trail on the east side of the ridge leads the way, avoiding the jagged and exposed crest, and we easily ascended these final 200 vertical meters, soon standing on the summit with absolutely incredible 360 degree views! Jagged mountains surrounded by lush, green valleys, with a deep blue sky and puffy white clouds overhead - the Opal Range is stunning to look at from afar, but even more-so when you're on it!! I've never seen a mountain range more jagged and prominent, with sheer pillars of rock, near-vertically dropping hundreds of meters to valleys on either side! I wanted to wait for the perfect day to climb this mountain, and I don't think it can get much better than this!
Incredible view, looking south, along the Opal Range! Tombstone, Rae (distant), Brock and Blane (stacked up), Pocaterra (distant), Wintour, and the unmistakable Mount Joffre towering over the Kananaskis Lakes (L to R).
Looking east towards the front range and the distant prairies. Ripsaw, "Garriochmill", Glasgow, Cornwall, Outlaw, "Janelea", and Tombstone (L to R).
Lawson, Assiniboine, Inflexible, Chester, Headwall, James Walker, Galatea, The Tower, Nestor, Old Goat, and Lillian (L to R).
Stunning, "in your face" view of Mount Packenham's vertical strata, contrasted by a vibrant, green valley below!
After a lengthy summit stay, we decided we shouldn't keep Kaitlyn waiting any longer, and started back down the summit ridge. We had absolutely no trouble retracing our ascent route, and it wasn't long before we were standing beside my sister once again - who proceeded to tell us that we went too fast, and she didn't even have enough time to finish her sketch 😂.
Descending through the notch at the col.
Downclimbing the moderate section.
After retracing our steps along the scree-ledge traverse, we made quick work of the final easy slopes.
Having no need to reascend KCR, we decided to try and reverse Kane's alternate ascent route via King Creek, and started down the meadowy slopes, aiming for the valley sandwiched between KCR and the impressive Opal Range peaks. Grassy slopes to skier's right of a significant drainage easily lead us down to the valley bottom, where we discovered a faint trail leading through the beautiful meadow.
Grassy slopes easily lead down on skier's right of the drainage. Photo credit: Dad
While it's impossible to tell, a faint trail actually leads through the overgrown base of the valley.
The meadows soon gave way to a rocky drainage.
The next few kilometers down the valley had lots of options and variety. Some odd ribbons lead the way, and we spent time both on a faint trail to skier's left of a rocky drainage as well as in the drainage itself. You can't really go wrong as long as you're at the base of the valley and going down.
Eventually we reached a major junction, where we joined up with the west fork of King Creek, and followed it out for the final couple kilometers to the highway. We had a few "close calls" thinking the canyon-like drainage would force us to get our feet wet, but we got lucky time and time again, hugging the steep walls on narrow ledges, and balancing across countless fallen logs.
Following the canyon-like drainage.
Phew! A convenient ledge hugs the steep wall, and saves us from getting our feet wet!
One of a kajillion log crossings...😂
While Kane makes this route sound very undesirable, I actually enjoyed the variety, and would highly recommend doing Mount Hood as a loop! The steep canyon walls are quite the sight, and the effects of the 2013 floods are wearing off, with faint trails forming once again. While Mount Hood turned out to be a much easier scramble than I anticipated, the views were even more stunning than I imagined, and Hood is easily one if my favourite scrambles in Kananaskis that I've completed so far!
Photo Gallery
Starting down from KCR's "summit block", to look for a route down to the saddle.
Starting down our chosen descent gully to break through KCR's east face.
We hugged the wall to skier's right to make use of the solid rock.
Following another loose gully down as we angle through the cliff band.
At the base of the second gully, a short series of rocky ledges took us down to the beautiful, meadowy slopes below the cliffs.
So many wildflowers!!
Since our gully route angled away from the saddle, we now had to traverse back to our left to reach it.
Traversing across an overgrown gully along the way.
While we encountered our share of bush, it was generally open, and easy to navigate.
It wasn't long before we exited the bush and found ourselves directly above the grassy saddle.
Mount Blane is one gnarly-looking peak!
A faint trail leads the way up the grassy slopes on the opposite side of the valley.
Looking back across the saddle, to KCR's seemingly impassible summit cliffs. But don't worry, it's not as bad as it looks! (Approximate route shown.)
The trail eventually faded away, and while we found ourselves waist-deep in bushes at times, route-finding wasn't an issue ;).
A more comprehensive view back to KCR, as we continue to gain elevation up Mount Hood.
Mount Packenham, emphasized by the sunlight, is the next peak down the Opal Range to the north.
The greenery gave way to rock, as we approached the base of Mount Hood. While it may not look like it, we were already higher than KCR at this point!
Looking up the scramble that lies between us and the summit of Mount Hood. While Kane recommends ascending the central gully directly up to the Hood/Brock col, that looked far from appealing, and we decided to try a different route instead...Our route began by ascending the slope to climber's left, before making a traverse higher up. (Approximate route shown.)
Starting up the initial, easy scree slopes.
Kaitlyn opted to wait for us below, taking the opportunity to do some art while we completed the scramble.
It wasn't long before we reached the base of Mount Hood's summit cliffs, and easily traversed a scree ledge to climber's right, rejoining with Kane's gully route.
Looking ahead to the final section up to the col...Looks like we might actually get our hands dirty!
Starting up the first moderate step of the whole climb! Photo credit: Dad
My dad starts his ascent.
Beautiful views back to the west, with Kananaskis Lakes on one end and Lawson's lengthy ridge stretching out on the other! Also, check out the precariously stacked rock, balancing on the left side of the frame!
Almost at the col! The prominent "V" notch is what you'll want to aim for here.
It's a long way down!
Looking across the Hood/Brock col, with Mount Brock rising impressively to our right!
Starting the final trek to the summit. While it feels as if you're almost there when you reach the col, there's still 200m of elevation left to gain! For reference, Mount Brock, rising impressively in the background, is the same height as Mount Hood...
Probably my favourite view of the day! The Opal Range is absolutely stunning to look at from afar, but even more-so when you're on it!
A scree trail, on the right side of the ridge, easily leads the way, avoiding the jagged and exposed crest.
The summit is just ahead!
The final few steps to the top of Mount Hood!
Evan-Thomas East (aka Ripsaw or Mount Sarcee) is one remote peak! For some reason, those hard-to-get-to peaks are so intriguing to me...I'd love to explore someday and see if a scramble route exists!
Glasglow, Cornwall, and Outlaw form a long, connected ridge that would be fun to traverse!
Looking across to the equal height Mount Brock, with Mount Blane looming about 100m higher in the background.
Mount King George is one of the few 11,000ers in the area and while it's about 30km away, it still can't be missed!
Bonus points if you can spot Kaitlyn 😉! (Hint: yellow jacket, almost dead-center of frame.)
Looking east towards the front range and the distant prairies. Ripsaw, "Garriochmill", Glasgow, Cornwall, Outlaw, "Janelea", and Tombstone (L to R).
Mount Lawson and Inflexible form a long ridge across Highway 40, with a collection of prominent peaks (French, Prairie Lookout, Murray, Birdwood, and Assiniboine), rising in the distance.
Looking towards Kananaskis Lakes, with two 11,000ers standing out from all surrounding peaks. (Joffre - left, King George - right)
Incredible view, looking south, along the Opal Range! Tombstone, Rae (distant), Brock and Blane (stacked up), Pocaterra (distant), Wintour, and the unmistakable Mount Joffre towering over the Kananaskis Lakes (L to R).
Mount Packenham neighbours to the north, and is an absolutely phenomenal mountain to look at as well!
Lawson, Assiniboine, Inflexible, Chester, Headwall, James Walker, Galatea, The Tower, Nestor, Old Goat, and Lillian (L to R).
Stunning, "in your face" view of Mount Packenham's vertical strata, contrasted by a vibrant, green valley below!
My dad has some lunch next to Mount Hood's summit cairn.
There's a new angle of Fisher Peak!
Our entry in the summit register. I couldn't believe we were the first ones of the year!
Yet another picture of Brock...😅
Dramatic lighting on Mount Packenham.
After a lengthy summit stay, we decided we shouldn't keep Kaitlyn waiting any longer, and started back down the summit ridge.
This angle of Mount Brock is so imposing!...But I think Cat Ears would be a better name 😉. (Unforunately I think it's already taken...😕)
Descending through the notch at the col.
Downclimbing the moderate section.
After retracing our steps along the scree-ledge traverse, we made quick work of the final easy slopes.
Looking across to the unique, grassy backsides of Grizzly Peak and Opal Ridge. You'd never guess it from their sheer cliff faces rising above the highway!
Having no need to reascend KCR, we decided to try and reverse Kane's alternate ascent route, and started down the meadowy slopes, aiming for the valley sandwiched between KCR and the impressive Opal Range Peaks.
A different, but no less impressive, angle of Mount Brock!
I don't know why, but I find this picture so funny 😂.
So many different wildflowers!
We stayed above a significant drainage, and descended the grassy slopes on skier's right.
I don't think I've ever seen such a green valley in our Rockies...This is so cool 🙂!
More wildflower action!
Looking back to Mount Hood.
Arriving at the valley bottom. Photo credit: Dad
Continuing down the meadow.
Wild Geranium.
Nodding Onion.
Wild Forget-me-not. No, I'm not that plant-savvy...a plant identification app helped me out just a little bit 😉.
While it's impossible to tell, a faint trail actually leads through the overgrown base of the valley.
Mount Blane rises high above us once again.
The meadows soon gave way to a rocky drainage which we followed down the valley.
That looks natural...😉.
Following a faint trail to skier's left of the drainage.
Eventually we reached a major junction, where we joined up with the west fork of King Creek, and followed it for the final couple kilometers to the highway.
Tried to hand-hold a 1/8 of a second shutter speed...and it actually turned out pretty good ;)!
Following down the canyon-like drainage.
Phew! That was a close call! As we approached this section we thought we'd have no choice but to get our feet wet...Lucky for us, a convenient ledge hugs the steep wall, and granted us dry passage :).